Overview
The IGP:Digital Publisher Fixed Layout processing options are very easy to use to create an iBooks-like simple fixed layout ePub for both the new IDPF fixed layout specifications or the older iBooks fixed layout format.
We can't give explicit advice on your content of course, but can give some ideas, techniques and considerations when planning and producing your fixed-layout books.
IDPF has increased the flexibility of fixed layout books but sadly this is not currently well supported by any readers.
A little good news is that iBooks has had a shot at supporting IDPF fixed layout. There are some nice things there, but there is a lot it doesn't do at present.
The IDPF Readium project seems to do most of the flow things alright, but it doesn't handled locked landscape well at all as the viewport is only ever half the width of the screen. It also appears to ignore the spread-none property as it forces no spread ePubs to be displayed as a spread. Then there is the irritating paper chrome to uglify everything. Even Apple has dropped that in the no-spread documents.
You should also be familiar with the iBookstore Asset guide and their list of recommended best practices. It is primarily just good sound advice.
The good thing about the new IGP:Digital Publisher packaging options is it makes it very easy to create and generate fixed-layout ePubs. That means it is possible to experiment with various options and test them on all target reading systems.
A brief tutorial on using the configuration files to create custom spine properties can be found in the article Configuring Fixed Layout Spine Properties.
Design and Setup Steps
1. Presentation Decision
Make the decision on how you are going to present your content. This decision may be made for you if you are more or less copying an existing physical book. If you are designing an original piece of content it is a lot more fun, and a lot more challenging.
Don't forget to take into account your target device(s) aspect ratio(s) as you make these decisions.
The options are:
1. Orientation options:
- Orientation auto. That means both orientations can be used.
- Orientation locked to portrait.
- Orientation locked to landscape.
Not all fixed layout content should be a two page spread. In fact most probably shouldn't be. Obviously portrait and landscape are not just different views of the same content. The old iBooks insisted that every book was a spread, and allowed rotation of the view with zooming.
2. Spread options:
- No spread.
- Spread only in landscape.
- Spread only in portrait.
- Spread in either orientation (auto).
There are obviously some mutually exclusive options there, such as you want the book to be in a spread in landscape, but you lock the orientation to portrait. The FLO spec. assumes you are not silly.
2. Decide the Page Size
- Set up your page size using the galley-rw element in the Reader CSS. See the guidelines below on page-size.
- Create and Insert and style your content into the document sections (pages).
- Set the Document Processing Instruction (DPI) options in the Fixed Layout Configuration options.
- Go to Formats on Demand and click the Fixed layout format package you want. There are three options:
- IDPF ePub
- iBooks ePub
- Hybrid ePub
- The new iBooks 3 supports only a limited sub-set of the IDPF specification so you will not be able to be too creative with the fixed-layout options if you are targeting iBooks. You can't do flow and fixed in combination for example. In fact iBooks wont take any notice of fixed-layout properties set in the spine. However it does ignore them elegantly.
Now that you have made your design and presentation decisions you can start working on your content.
Setting Up a Template
Creating a Viewport Simulator
It is relatively easy to create a viewport simulator for your content if you are using a DP document section per page. Just set the size of the .galley-rw selector to the size of your page in the CSS Editor.
Open the CSS Editor. Go To Reader | Processing | ZY Editorial Assistants, and insert the following CSS. Any CSS in Editorial Assistants does not appear in the output format CSS as the packaging processor strips these.
We have been using this simple CSS:
/* Put this CSS in Reader|Processing|ZY Editorial Assistants */
body {
    background-color: rgb(220, 220, 220);
    padding: 20px;
    }
.galley-rw {
    position: relative;
    width: 738px;
    height: 985px;
    transform: scale(0.70, 0.70);
    transform-origin: top, left;
    -moz-transform: scale(0.70, 0.70);
    -moz-transform-origin: top, left;
-webkit-transform: scale(0.70, 0.70); -webkit-transform-origin: top, left; margin: 0; padding: 0; background-color: rgb(255, 255, 255); }
Here we turn the whole IGP:Reader page gray with the body styles and apply a little padding to give a frame. Next the .galley-rw element is set to the required page size.
The dimensions in this example are the standard iBooks FLO page size. If you are creating large pages such as 2000px X 1500px the transform lets you scale the page for viewing in the reader panel without having to scroll. Webkit still requires the -webkit prefix for transforms so if you are using Chrome you will have to put this in. Firefox doesn't require it.
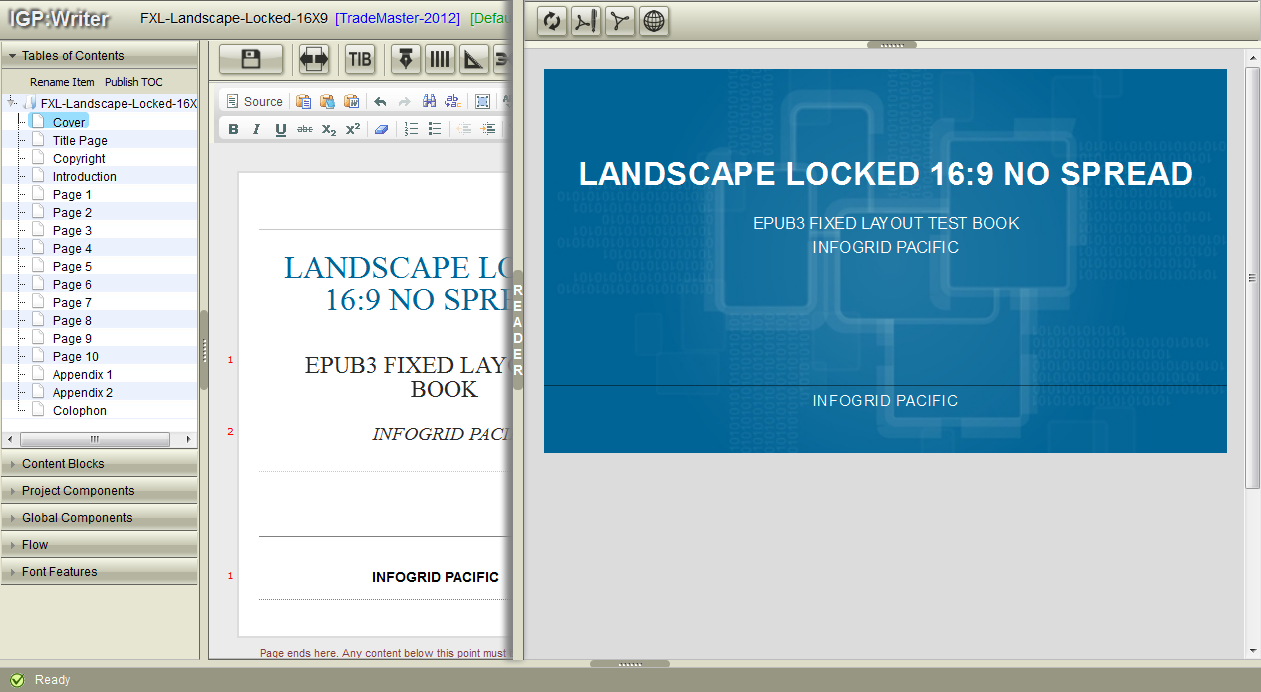
Here is a screen shot on my 1366px X 768px laptop monitor with a scaled 50% transform of the cover page of one of our test documents.
Dimension Control
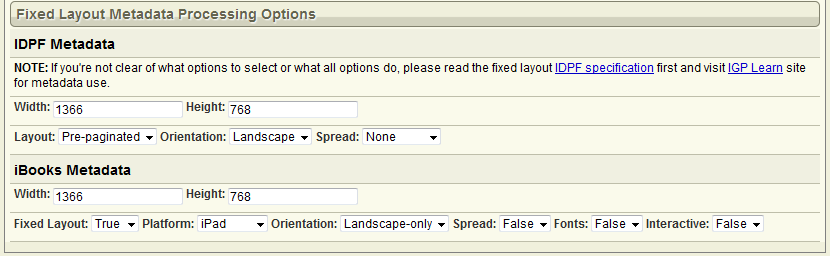
You specify the size of the viewport that is going to be inserted into the ePub from the Fixed Layout controls in the Fixed Layout Metadata Processing Options form.
This is all that is required if you are generating a fixed layout eBook without any spine references.
However you also need to make sure your pages in the book match the body statement. This is important if you are using background images or have a colour or gradient applied to the section div.
Don't put borders on any section div elements so you keep the dimensions precise.
It is also good to remember that by default the FX template CSS has all <div> elements as border-boxes so borders are inside the frame and reducing the size of the presentation box by the width of the border specified.
But remember this very important point. When the ePub is generated the FX sections (eg. Part-rw, Chapter-rw, etc.) are converted to HTML5 <section> elements, so you need to include a statement for that as well.
Put this CSS into the Reader|F0 Sections part of your CSS.
/* Put this CSS in Reader|F0 Sections  */
div, section {
    -moz-box-sizing: border-box;
    -webkit-box-sizing: border-box;
    box-sizing: border-box;
    }
.frontmatter-rw, .body-rw, .backmatter-rw, .specials-rw {
    position: relative;
    width: 738px;
    height: 985px;
    overflow: hidden;
    /* any other styles for backgrounds, etc */
    }
The last group of CSS properties makes sure all sections are sized height and width to match your page and as a precaution overflow:hidden means any content that goes outside the frame wont be seen.
If you are making a fixed/flow combination book (not compatible with iBooks) it is better to allocate a defined section selector for the fixed layout sections and reserve the book selector section grammar for the rest of the book.
/* Put this CSS in Reader|F0 Sections  */
div, section {
    -moz-box-sizing: border-box;
    -webkit-box-sizing: border-box;
    box-sizing: border-box;
    }
.Section-rw {
    position: relative;
    width: 738px;
    height: 985px;
    overflow: hidden;
    /* any other styles for backgrounds, etc */
    }
=============================================
/* Add this CSS in Reader|F1 Galley  */
.Galley-rw {
    .....
    width: 738px;
    height: 985px;
    overflow: hidden;
    }
Of course you set the target section selectors and width and height in all the above for your book. Remember for iBooks it is a requirement the HTML file meta data and CSS page sizes must be the same. For AZARDI the CSS page size must be the same size or smaller.
In this example Section-rw has been set for the fixed layout pages.
Now your content can be placed anywhere in the Section-rw panel.
No comments:
Post a Comment